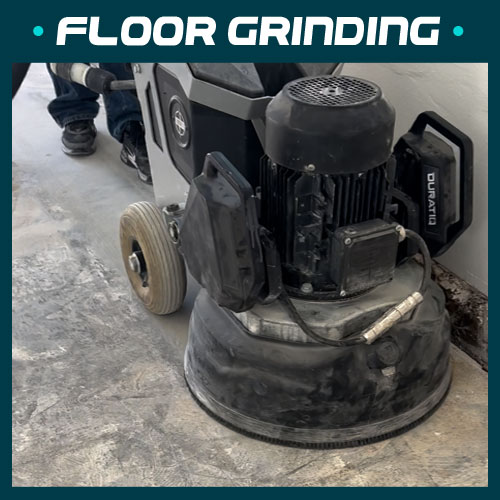
The first crucial step in preparing for an epoxy floor coating is meticulous concrete grinding. This process ensures optimal adhesion by creating a slightly rough, porous surface for the epoxy to grip. Grinding removes any existing sealants, contaminants, or loose particles that could compromise the bond. Following the grinding phase, thorough vacuuming is essential to eliminate all dust and debris. This clean surface allows for a flawless epoxy application. Finally, we address any imperfections in the concrete, such as cracks or small holes, patching and leveling them to provide a smooth and uniform foundation for the epoxy coating.
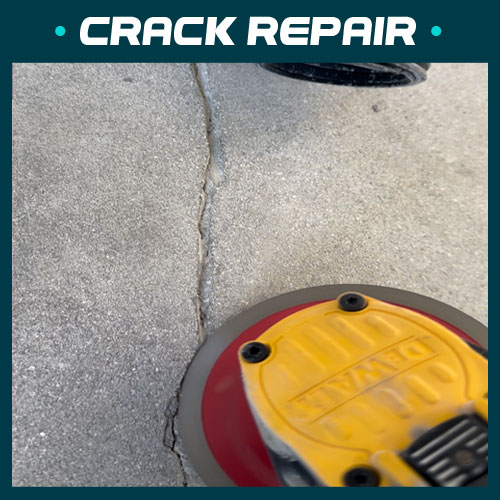
Crack & Hole repair
When dealing with gaps and cracks prior to applying epoxy, it’s crucial to prepare the surface properly for optimal adhesion and a lasting repair. Simply filling the voids without this preparation can lead to future failures. Therefore, it’s generally considered good practice to “open up” the pores of the surrounding material and slightly regrind the edges of the gap or crack. This process creates a larger surface area for the epoxy to bond to, removes any loose debris or weak material that could compromise the bond, and allows the epoxy to penetrate deeper into the existing material
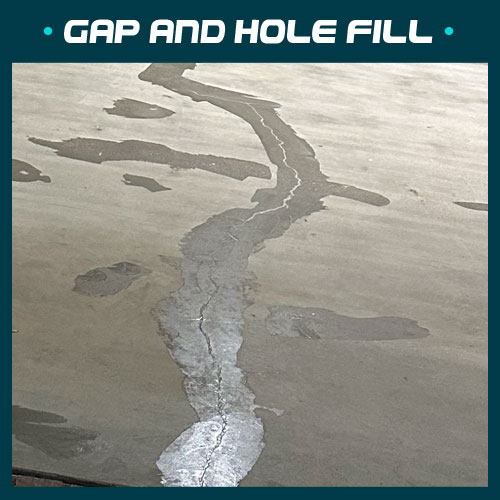
Crack & hole filler
After meticulously grinding and opening up the pores within the gaps and imperfections, the next crucial step involves applying an epoxy-based gap filler. This filler is carefully worked into the prepared surfaces, permeating the opened pores and creating a strong, lasting bond. The epoxy’s specialized formulation is designed to seal and even out all gaps, holes, and imperfections, effectively restoring the structural integrity and aesthetic appeal of the material. By completely filling these voids, the epoxy prevents water infiltration, inhibits further degradation, and provides a smooth, uniform surface ready for subsequent finishing processes.
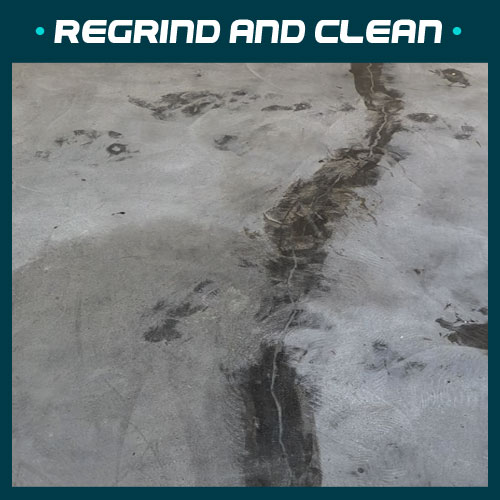
Regrind & clean
After applying the gap filler, a crucial step in the process is regrinding and inspecting the surface. This ensures that the filler is flush and even with the surrounding material, creating a uniform surface ready for coating. This meticulous regrinding is paramount because it directly impacts the final adhesion and integrity of the coating. Uneven surfaces or poorly distributed filler can compromise the bond, leading to potential failures in the long run. Therefore, taking the time to properly prepare the surface at this stage is an investment in the longevity and performance of the finished product.
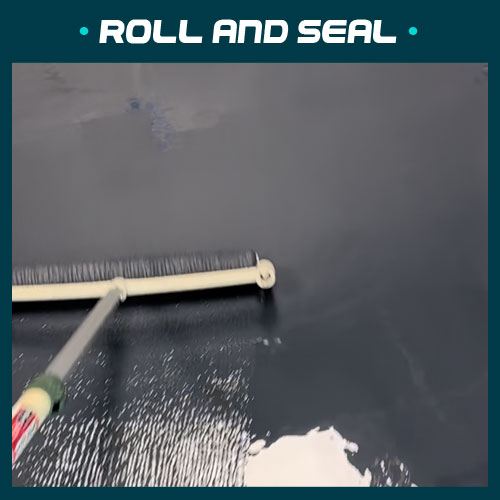
Roll & Seal
Once the floors have been meticulously prepared – cleaned, etched, and any necessary repairs made – we move on to the crucial step of applying the epoxy primer or vapor barrier. This layer serves as the foundation for the entire epoxy flooring system. The primer ensures a strong bond between the concrete substrate and the subsequent epoxy layers, maximizing adhesion and preventing delamination. If the concrete is prone to moisture issues, a vapor barrier is installed at this stage to mitigate moisture migration that could compromise the integrity of the epoxy. Immediately after applying the primer or vapor barrier.
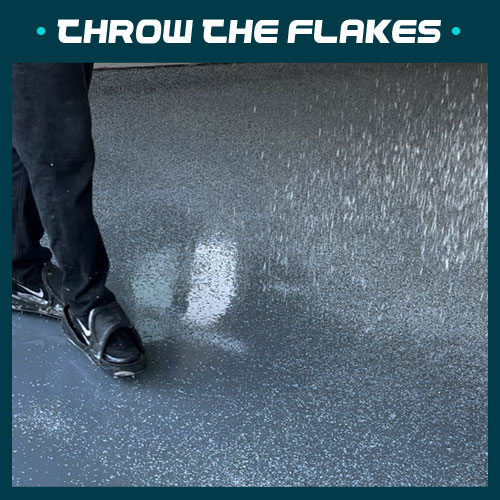
Flake chip process
Once the epoxy base coat is applied and still wet, we proceed to broadcast the decorative flakes. The goal is to achieve full flake coverage, meaning the flakes are liberally scattered until the entire floor surface is completely saturated, creating a dense and visually appealing layer. This ensures a uniform and textured finish, obscuring the base coat and maximizing the aesthetic impact of the flake system. This complete saturation is key to achieving the desired look and durability of the epoxy flake floor.
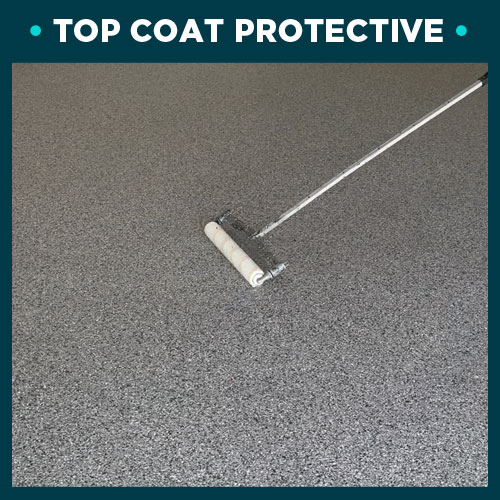
Top Coat Protective
After the floor has been thoroughly cleaned, the next step is to apply a topcoat of polyaspartic. Polyaspartic is a type of coating that is known for its durability and resistance to wear and tear, making it an ideal choice for high-traffic areas. It also has a quick cure time with a light walking after 24 hours and full cure in 5 days, which means that the floor can be used and walked on again much sooner than with other types of coatings.
The floor is finished
With the flooring project complete, the freshly laid floor is now ready to be admired, but patience is key. The floors require a curing period that can last up to 5 days, but can be lightly walked on after 24 hours and normal traffic after 72 hours during which time the adhesive or finish fully sets and hardens. Refraining from heavy foot traffic, furniture placement, and cleaning during this crucial period will ensure the integrity and longevity of your beautiful new floors.